Tutorial: Build with Infura on Ethereum-Compatible Layer 1 Network Celo
Deploy a smart contract to the Celo testnet and build a React dapp frontend using Truffle, Infura and Celo Composer.


Infura is excited to announce the addition of the Celo network to the Infura platform. Celo is an EVM-compatible Layer 1 built with the hope of accelerating social good through blockchain. It’s a major player in ReFi, or “Regenerative Finance,” a movement employing Web3 to solve societal issues such as climate change, income inequality and biodiversity.
Since much of the world operates from their smartphone, Celo treats cellphones as first-class citizens in their network. The mobile crypto-wallet Valora was first developed within Celo before spinning out in 2021.
Celo supports the above laudable goals through a number of initiatives and technical features such as:
- Using zero-knowledge proofs and a carbon negative Proof of Stake (PoS) consensus mechanism to lower its environmental footprint. Celo’s carbon negative PoS is achieved via daily offsets through its work with Project Wren.
- Ensuring low gas fees, which can be paid in ETH, the CELO token or any of Celo’s native stable coins, such as cUSD, cEUR or cREAL
- Prioritizing mobile-first usage through its development of the external project Valora and emphasizing mobile-optimized languages such as React, React Native and Flutter.
All of these features make Celo attractive for those looking to use blockchain for good. Are you ready to build on it? In this tutorial, we’re going to show you how easy it is to get started with Celo Composer using Infura and Truffle. By the end of this article, you will be able to deploy a smart contract to the Celo testnet and build a React dapp frontend.
Prerequisites
Before getting started, make sure that you have all the necessary snacks for this wicked-cool roadtrip:
- An Infura account
- node & npm installed (in this guide → v16.xx.x)
- Your favorite IDE
Getting started
Create a new Web3 access key with Celo endpoints
We will start with creating a new Infura Web3 access key (previously, project ID) with Celo endpoints enabled. This key will be used by our application to execute transactions against the Celo network. Here’s how to do that with Infura (or follow this Getting Started guide).
- Log in to the Infura main page
- Click on the button on the right-hand side - Create new key
- From the modal that pops up:
- Select Network → Web3 API
Type anything you like into the Name field 🙂
Click on “Create” - Scroll down until you spot Celo
- From the network dropdown, select the Alfajores testnet endpoint
- Click on the right icon to copy the content
The output should be:
https://celo-alfajores.infura.io/v3/Note this down, as this is going to be useful further ahead on this tutorial.
Celo Composer
Celo Composer provides easy templates to get started with development. You can use Celo Composer by following the steps in the Readme.
To use Truffle, there’s a bit of tweaking that you have to do.
You have two options:
1. You can either clone the original repo and uncomment out the Truffle lines (here, here, and here)
or
2. You can fork a repository where we’ve taken care of that for you:
`Git clone http://www.github.com/cooganb/celo-infura-truffle`
Testnet Funds
We’ll need some testfunds from Alfajores, Celo’s testnet. Grab your nearest MetaMask developer account and claim some free fun money. (The testnet site will add Alfajores to your MetaMask account if you allow it. If for some reason you don’t get prompted, check out Chainlist.)
Now that we’ve got some funds to work with, let’s deploy our contract to Celo’s testnet. We’ll do it two different ways. First, we’ll use Infura and Truffle command line deployment. Next, we’ll use Truffle Dashboards with a custom Infura add-on.
Deploying the contract
Method 1: Command Line Deployment
For this demo, we’re going to be compiling a basic Greeter contract to Celo that’s already been written and prepared. We’re using Truffle to compile contracts. Make sure you have Truffle installed and then run the following commands:
cd packages/truffle
yarn install
truffle compile
For contract deployment, we need to create and add our private key that has our Celo testnet funds to an .env file in the Truffle directory.
You’ll also need to add your Infura account information to the truffle-config file. Fill that in here; it’s also shown below:
networks: {
	alfajores: {
		network_id: 44787,
		provider: () =>
			new PrivateKeyProvider(
				PRIVATE_KEY,
				`https://celo-alfajores.infura.io/v3/${INFURA_API_KEY}`,
	),
},
celoMainnet: {
	network_id: 42220,
	provider: () =>
		new PrivateKeyProvider(
			PRIVATE_KEY,
			`https://celo-mainnet.infura.io/v3/${INFURA_API_KEY}`
			),
	},
},
Once we have the above details in place, we can deploy the contract using the following command:
truffle deploy --network alfajoresAssuming we have enough funds and we’ve properly set up truffle-config.js, we should see our contract deployed successful in the terminal.
Method 2: Infura + Truffle Dashboard Deployment
If you’ve already deployed the contract using the above method, you can skip to “Building the Frontend”
Of course, there’s more than one way to deploy your smart contract, so let’s take a look at adding Infura as a custom endpoint. Truffle has a great feature called Dashboard, where all we need to do is make sure we use the MetaMask account from the previous example. It’s a great option we can use to safely deploy our contracts and be able to track metrics from our Infura dashboard.
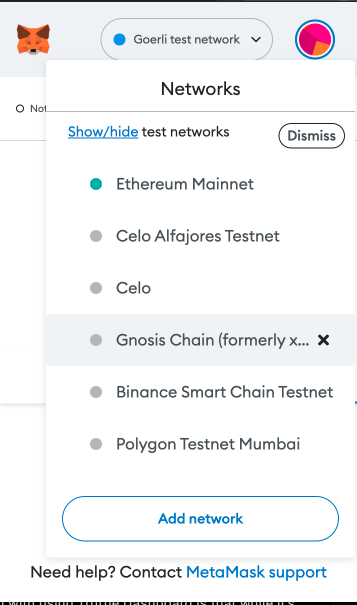
First, let’s add our Infura Celo endpoint to MetaMask. Under the “Network” settings in MetaMask, click “Add Network”:
Then, add in the network details, but putting using your specific Celo RPC endpoint from Infura:
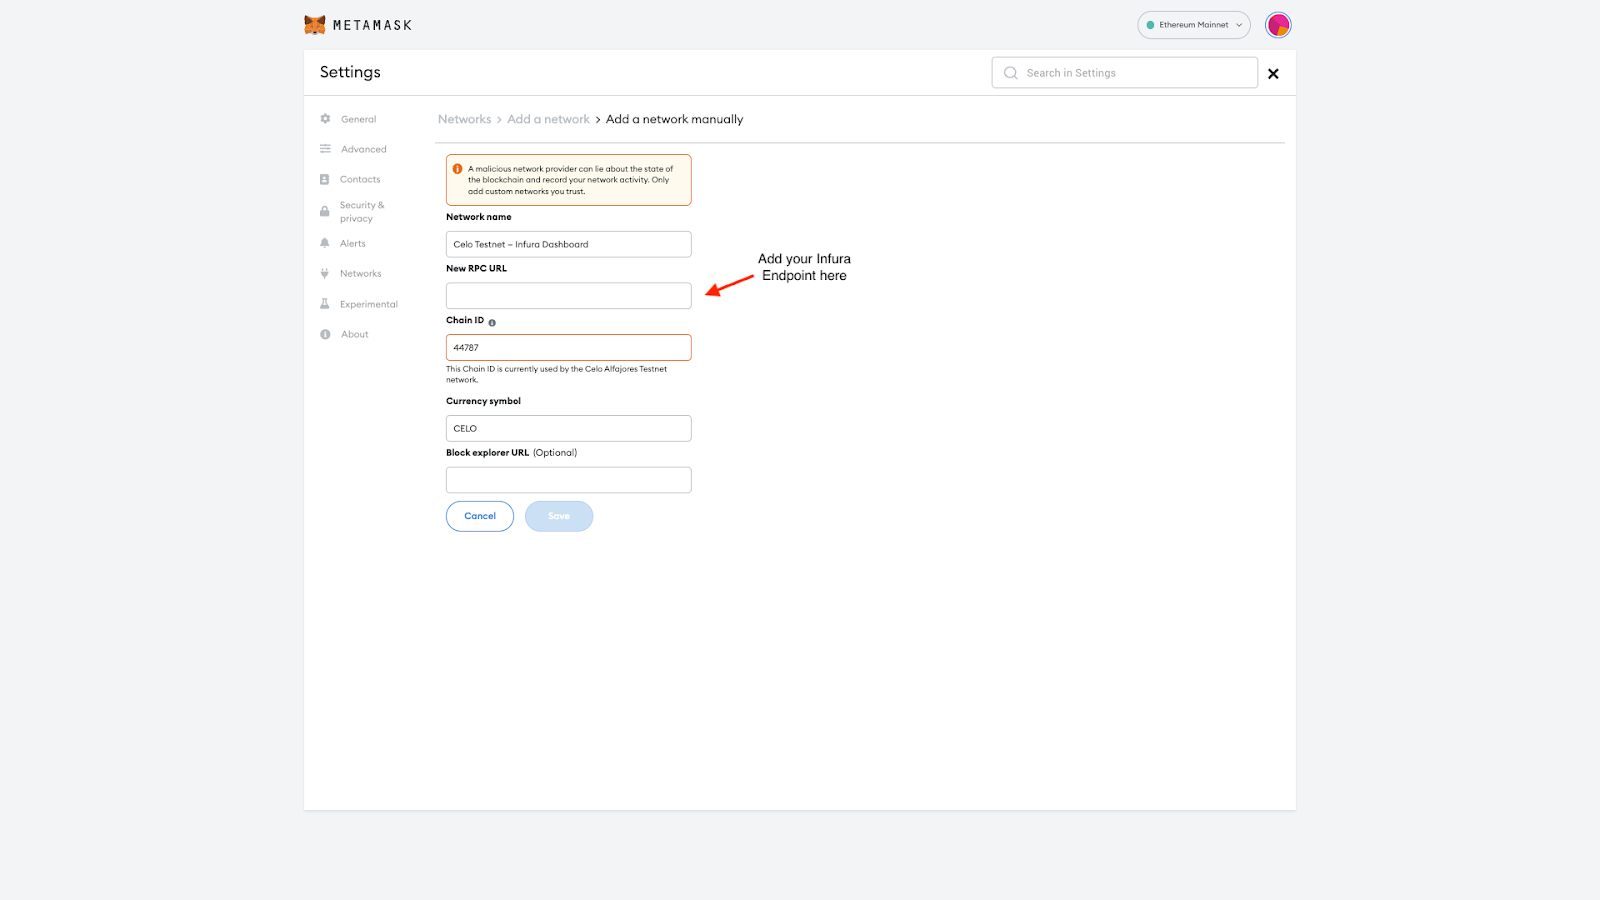
Click “Save” and you have your Infura-enabled Alfajores network endpoint ready to go.
Fire up Truffle Dashboard in a new terminal with:
truffle dashboardYou should see a browser window open. Click “Connect Wallet” and make sure you’re on your custom Infura endpoint account:

Open up a new terminal and run the following command to deploy the Greeter contract:
truffle deploy --network dashboard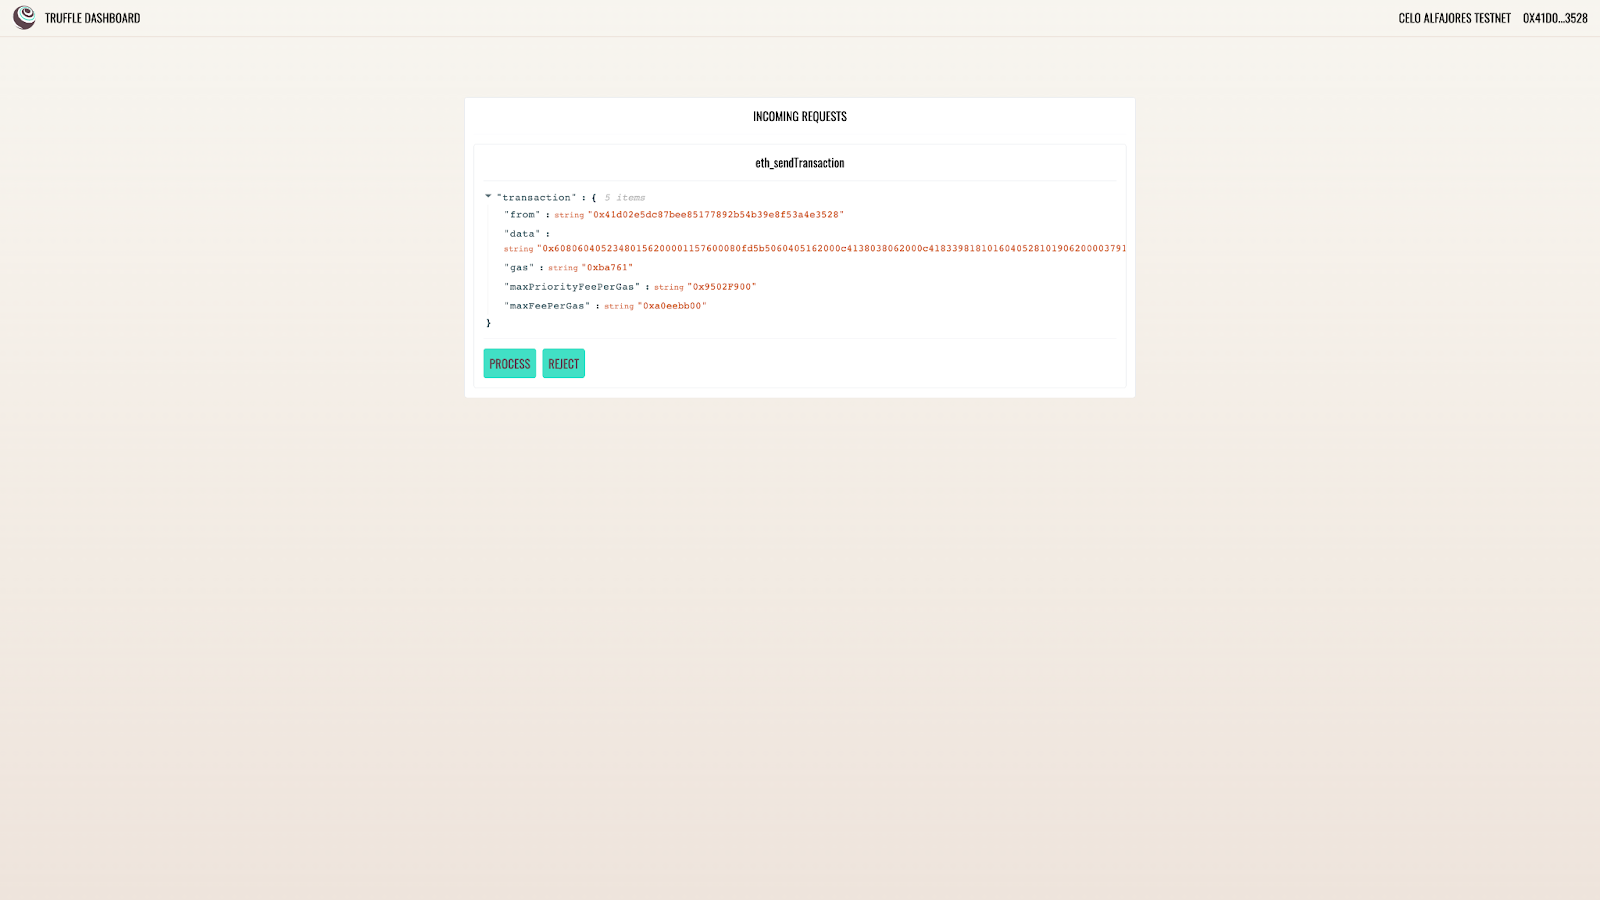
Click “Process” on the transaction and it will prompt MetaMask to open. Confirm the transaction.
Assuming you have funds and everything goes well, the contract should be deployed.
Building the Frontend
Now, let’s set up the frontend side of things. We’ll set up React but you can use React Native (with or without Expo) or Flutter as well.
Move into the react-app packages folder, install the dependencies and get a development environment going:
cd ../packages/react-app
yarn install
yarn dev
Open up `localhost:3000` (unless you changed the default port) on your browser and connect your wallet. Unlike for Ethereum, with Celo there are a number of different wallet options, including Valora. This speaks to the diversity of development happening on the Celo network.
Once you connect with the account that you had funded through Alfajores, you should see the following:

Click on the `0` index on the toolbar and you’ll get the information about the Greeter contract we deployed:
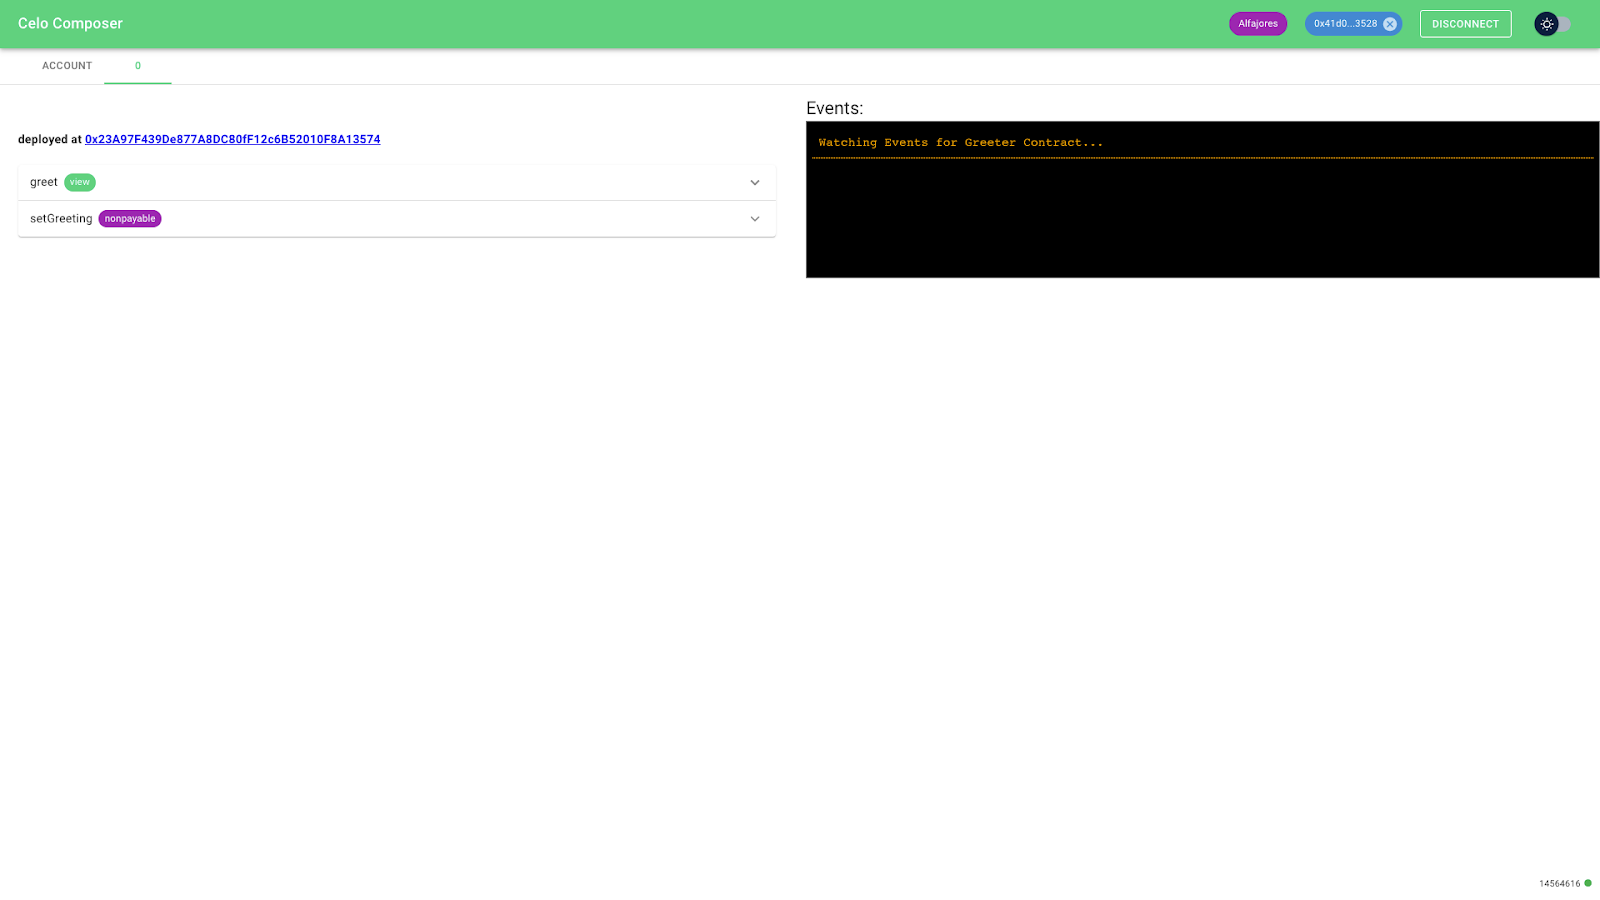
From here, you can read or set the value `greet` from our contract. Give it a try!
Conclusion
This is just the beginning of what’s possible on Celo with celo-composer. If you want to build something with the template, use `npx @celo/celo-composer` and select the `react-with-tailwind` template. Celo-composer also has support for more mobile-first languages, such as Flutter and React Native.
Celo also has an exciting new feature coming out soon called SocialConnect, an “open source protocol for creating attestations mapping off-chain identifiers” such as cell phone numbers, Twitter accounts or e-mail addresses.” It allows Celo users to send money to those identifiers, even if the users behind those accounts do not have a Celo account yet. Once they login and claim the identifier, they can claim the funds. It’s an innovative approach that could have an enormous impact on the remittance industry, since people could use SocialConnect to send funds in stablecoins to friends and relatives.
All this speaks to the focus of cLabs, Celo Foundation and the Celo protocol to bring the efficiencies, inclusiveness and other benefits of blockchain to the places most in need of financial and environmental assistance. Infura is excited to join with Celo in these efforts.
To start building with Celo on Infura, sign up for a free account now.
For more technical documentation, please visit our docs.