The Principles of Web3 UX Design Part 2: Lessons from UX Research for Product Design
The second installment in 'The Principles of Web3 UX Design' series expands upon insights gathered from UX research in product design, additionally providing a quick guide to begin creating your own MetaMask Snaps for an improved user experience.


The second installment in 'The Principles of Web3 UX Design' series expands upon insights gathered from UX research in product design, additionally providing a quick guide to begin creating your own MetaMask Snaps for an improved user experience.
Web3 moves at lightspeed. What’s new today might be outdated by tomorrow. Building in web3 doesn’t stop, especially during the crypto winters. From new blockchains, protocols, and users - the action in web3 doesn’t stop.
Developers are actively creating, while product teams are aiding them by simplifying their tools. The more user-friendly a tool is, the better the experience for the end-user. In the context of Consensys products - Infura and MetaMask for developers, the end-users are the developers themselves. Our goal is to perpetually enhance the developer experience of these tools and the infrastructure we offer.
From numerous UX research studies, we have derived key insights and learned extensively. In this article, we aim to share some valuable lessons garnered from designing products in the web3 space. If you have just stumbled upon this part, be sure to check out part one for a better understanding.
Prepare proactively for UX research roadblocks
Web3 is a growing industry. Trying to be perfect in this field is not practical. We need to stay humble and keep a close eye on the constantly changing environment. Perfection should not stop us from doing good work. We know we will face challenges, but we can prepare for them in advance.
Our research in web3 aims to connect with developers. These are people who value their privacy and are not easily swayed by flashy web2 marketing tactics. They prefer creating to talking. With this in mind, we anticipate that things might take longer than we hope. We also expect that some people might not show up for our research sessions.
So, what's our plan to deal with these issues? We've got a strategy. When we're looking to involve web3 developers in UX research for product design, our Consensys research teams take several steps:
- We invite more people than we need.
- We add an extra two weeks to our timelines.
- We use a variety of methods to find participants.
These approaches help us talk to enough developers. This way, we can make smarter decisions about our product design. They also help our research team set achievable goals and deadlines. Plus, they make it easier to share our findings with the rest of the team. In the end, this makes our teams more effective and valuable throughout our organization.
Web3 builders know what they want
Engaging in conversations with web3 builders and developers requires asking the right questions, a topic we covered in the first part of this series. This approach helps in unveiling the unfulfilled needs of your users. It is particularly crucial when talking to builders, as it provides clear insights that inform actions to enhance your product’s user experience.
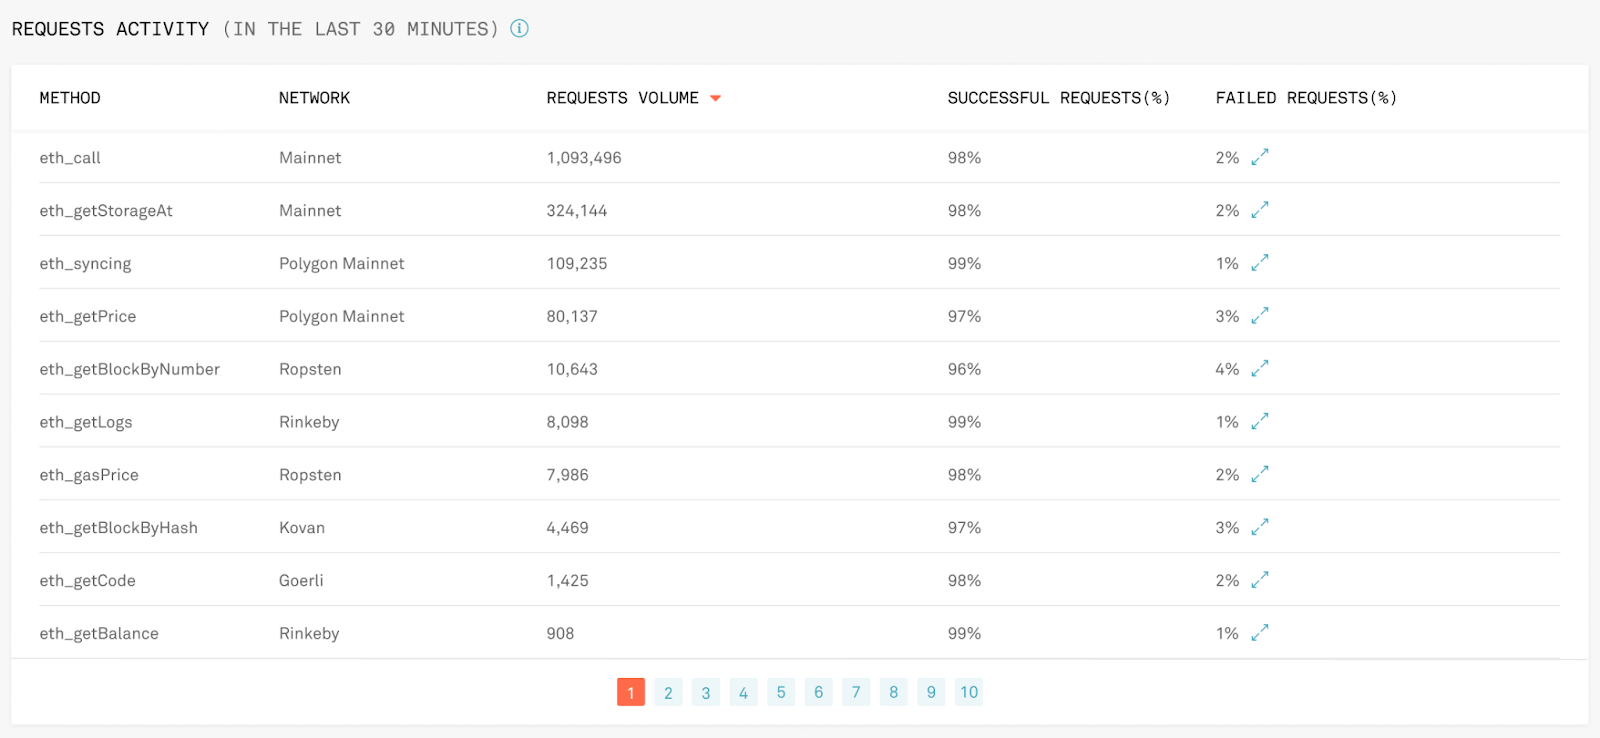
Web3 developers have a clear understanding of their needs and preferences. Take, for instance, our experience while testing an updated version of Infura’s stats page. We discovered that monitoring their project’s health was a top priority for all the developers we interacted with. They emphasized the necessity of knowing which transactions and methods were performing well and which were not.
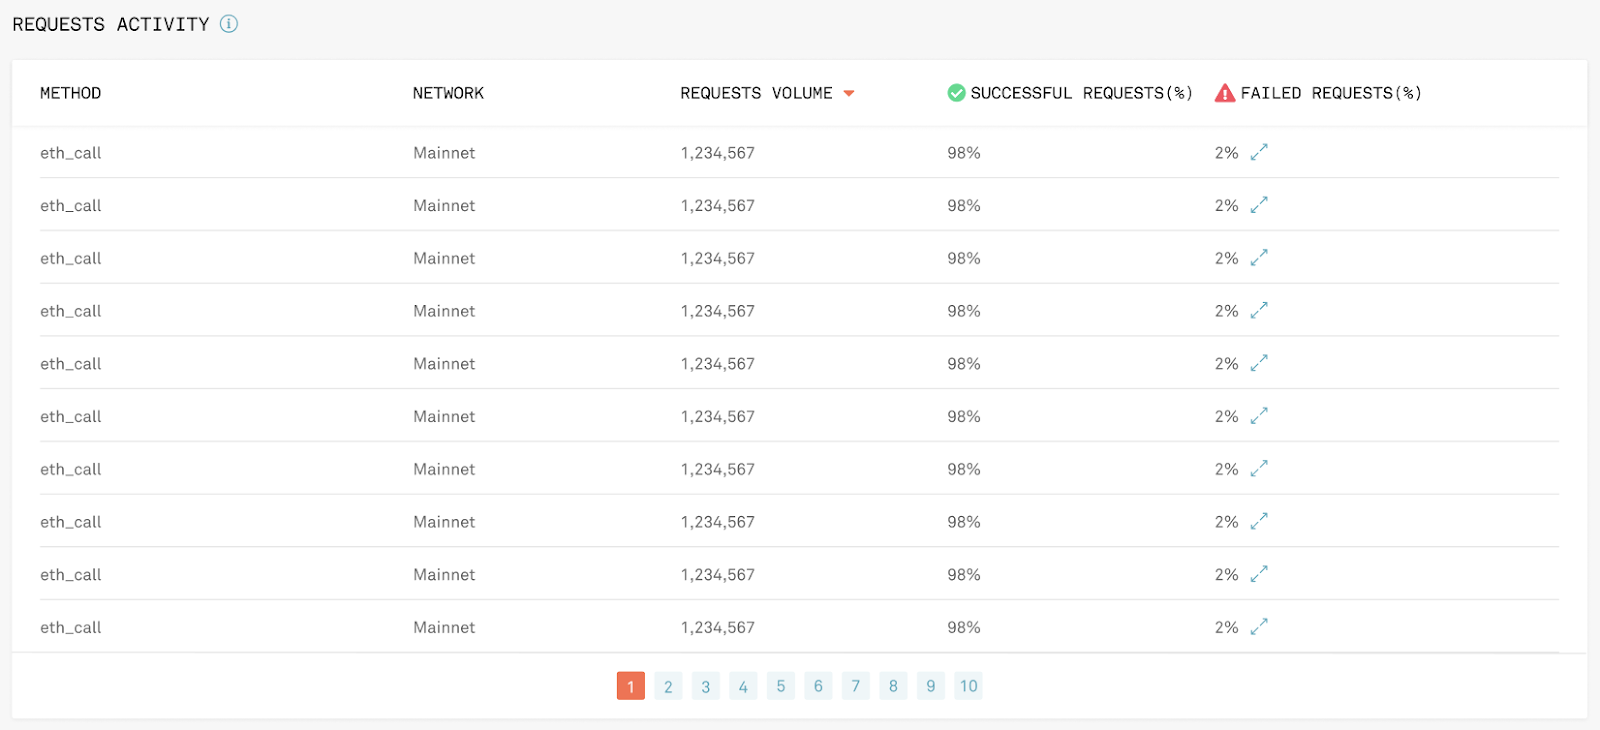
We figured out that addressing this issue was just a matter of tweaking the presentation. By making the header text smaller and incorporating graphical icons in the last two columns where the results were displayed, we successfully resolved the problem.
Before Research
After Research
Another example that highlights the clarity developers tend to have is when the research team was investigating our new project-sharing feature.
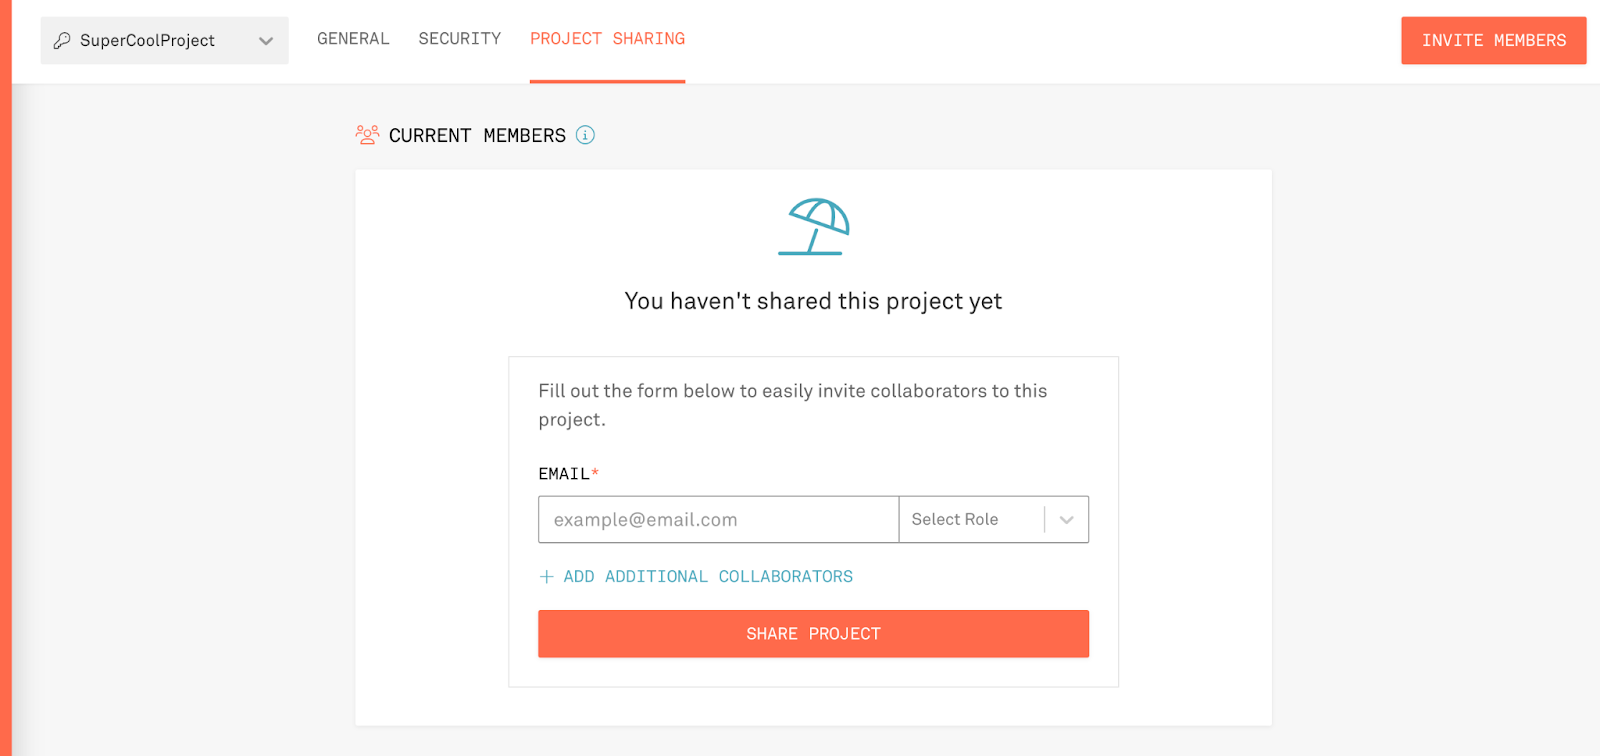
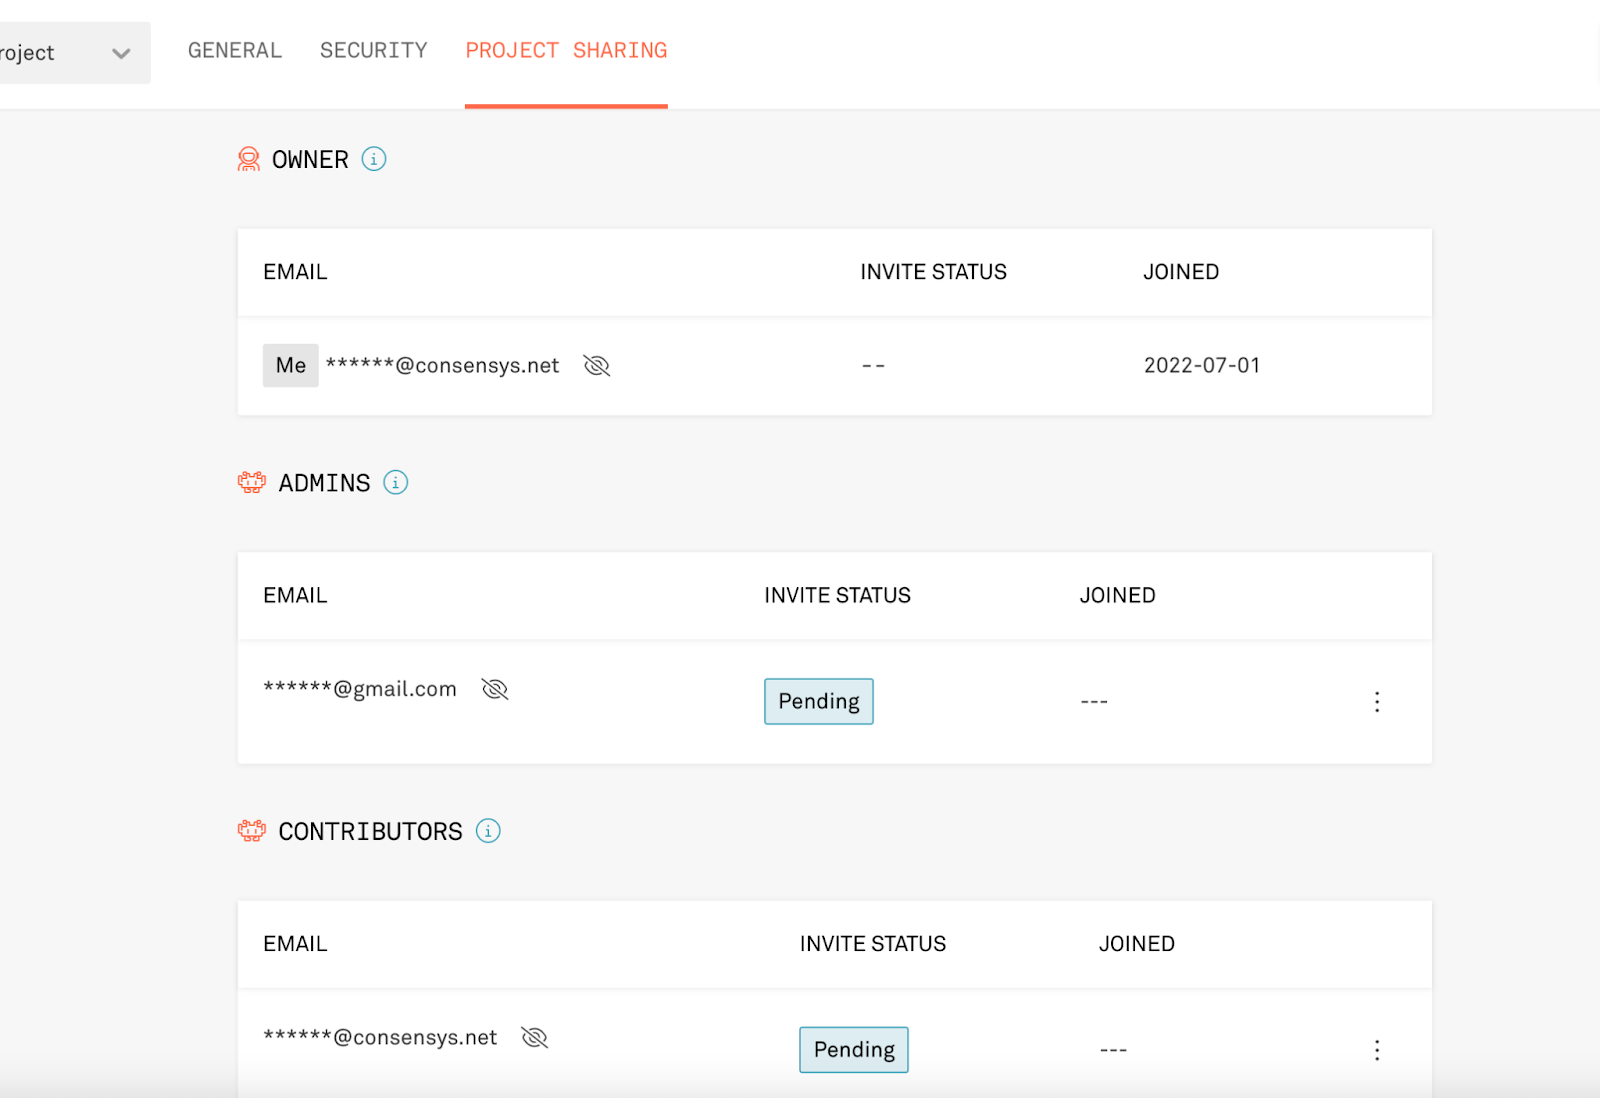
In our quest to comprehend the mental model behind how account owners planned to assign privileges to project team members, we made an interesting discovery. The account owners preferred assigning roles based on the team member's role type rather than on an individual basis. This approach made it simpler for them to manage and incorporate people into a team, particularly in larger teams with over 10 members.
These insights from just two research initiatives consistently emphasized the clear understanding web3 developers have about their needs and preferences. It underscores the importance of listening to your audience to craft product designs that truly add value.
While our research has predominantly centred on enhancing the developer experience in product design, we recognize the significance of the end-user experience (UX) as another vital facet of design. There's a wealth of knowledge yet to be uncovered from end-users in web3, especially as its adoption continues to spread worldwide.
A quick guide to start using MetaMask Snaps for improved UX
In part one of this series on web3 UX design, we looked at why MetaMask Snaps are useful and highlighted three ways Snaps can make the user experience of web3 dapps better: Interoperability, Authentication, and Security. Now, we're going to walk through the steps to start building your first MetaMask Snap.
Step one: Install MetaMask Flask
The first step is to install the MetaMask Flask browser extension. This special version of MetaMask gives developers early access to new features. In this guide, we'll use it to work with the Snaps API.
Once you have Flask set up, you’ll need a few more things to get started:
- A text editor
- Yarn version 3
Step two: Create a Snap project
Now, you're ready to create a new Snap project. Run this command with the @metamask/create-snap CLI:
yarn create @metamask/snap your-snap-name
Next, go to the root of the new project you just created and install the project dependencies:
yarn install
After that, start the development server:
yarn start
You should now be able to access your Snap server at http://localhost:8080 and the frontend at http://localhost:8000.
With your Snap running, connect to it by clicking the 'Connect' button on the frontend. The MetaMask Flask extension will appear, asking you to approve the Snap's permissions. Once connected, click the 'Send message' button to show a custom message inside a confirmation screen in MetaMask Flask.
Step three: Delve deeper
Developing a Snap lets you add to or change the MetaMask JSON-RPC API however you need to. This gives you the power to add new features or even work directly with MetaMask, using Snaps Exports, Snaps JSON-RPC API, and permissions.
Before you start developing your Snap, make sure you understand:
The Snap anatomy.
The Snap lifecycle.
The Snap user interface.
The MetaMask Snaps execution environment.
Feel free to start with the Snaps template, or get your hands dirty with a tutorial to really get things going.