The Developer’s Guide to File Storage and IPFS
In this guide, we delve into the advantages of IPFS for decentralized storage in web3 applications and demonstrate how to seamlessly connect to IPFS with Infura.


In this guide, we delve into the advantages of IPFS for decentralized storage in web3 applications and demonstrate how to seamlessly connect to IPFS with Infura.
For most decentralized applications, writing and deploying a smart contract is only half the job. You'll also need to develop a frontend that interacts with your smart contract, providing an intuitive interface for your end users. Moreover, if you're working with NFTs, you'll need a solution for generating and storing NFT metadata in a decentralized manner.
While the majority of web2 applications and websites store their digital assets, code, and media files in centralized storage—typically managed by cloud services like AWS or Azure—in the web3 paradigm, dapp developers opt for decentralized storage solutions. InterPlanetary File System (IPFS) is among the most popular of these web3 storage solutions.
In this guide, we'll delve into IPFS, highlighting its advantages over centralized storage options like those offered by AWS and Azure. We'll conclude by detailing how to host and retrieve files on IPFS using Infura.
What is IPFS?
IPFS is a distributed protocol designed to foster a more decentralized and resilient internet. Developed in 2015 by Juan Benet and overseen by Protocol Labs, IPFS has rapidly become one of the most favored decentralized storage solutions. It has seen widespread adoption by indie dapps to major market players like Aave as well as NFT projects within the Ethereum ecosystem.
IPFS employs a protocol called BitSwap to implement a network that facilitates peer-to-peer sharing of content and files. Its goal is to unify into a single global network, operating in such a way that if two users publish a block of data with identical hashes, peers downloading the content from "user A" can also exchange data with peers downloading from "user B".
Once a file is uploaded to IPFS, it remains on the network indefinitely and can be accessed by anyone, as long as at least one party has pinned or stored a copy of it.
Benefits of IPFS compared to centralized alternatives
Content-based addressing: Traditional storage services offer file hosting through HTTP URLs. These URLs are location-based, meaning that fetching data relies on the data's specific physical or virtual location.
Moreover, it is straightforward to alter the contents available at a given URL. For instance, after uploading an image named 'dog.jpg', we might get a URL like: https://mywebsite.com/dog.jpg. If we replace this image with another, but keep the same name, the URL stays unchanged, but the content differs.
This becomes problematic when managing assets like NFTs, where the integrity of metadata is paramount.
In contrast, IPFS adopts content-based addressing. The IPFS URL for a file hinges on its content. Should the file's contents alter, the IPFS URL pointing to it will change as well. Consequently, IPFS ensures that data linked to a specific URL remains consistent and immutable.
Decentralization: Traditional web hosting typically relies on centralized servers to store and manage data. In such a setup, if the central server faces an outage, undergoes maintenance, or experiences any form of compromise, users are left without access to their data. This central point of failure is both a security and accessibility concern.
Contrastingly, IPFS operates on a foundational principle of decentralization. Rather than being stored on a single central server, files on IPFS are spread across a vast global network of nodes. Each file is broken into chunks, and these chunks are stored redundantly across multiple nodes. Consequently, if one node goes offline or faces issues, the data remains accessible, as other nodes holding the same file can provide it. This design not only enhances data availability but also fortifies against potential data loss or censorship.
Moreover, the decentralized nature of IPFS reduces the risk of DDoS attacks. Traditional servers can be overwhelmed with traffic, making them susceptible to such attacks. With IPFS, requests are distributed across various nodes, diluting the impact of any single surge in traffic.
Resilience: Data availability on a centralized server depends on the server's uptime and the data's persistence in that location. If the centralized cloud solution in use experiences an outage, or if the file owner deletes them, these files become irretrievable.
For web3 projects, especially those encompassing NFTs, this presents a significant risk. Imagine NFTs stored on a centralized platform: a malicious entity could sell the NFTs and, after the transaction, erase all related files from their server.
IPFS offers a robust defense against such misconduct. As a decentralized solution, when content uploads to the IPFS network, anyone globally can connect, save a local or server copy, and then distribute it to clients worldwide. The robustness of IPFS is unmatched. Its architecture ensures that data remains perpetually accessible, free from reliance on a lone peer or centralized entity.
How to access IPFS through Infura
Directly interacting with IPFS can be a challenge. However, Infura solves this problem. Infura offers an API that facilitates easy uploading and management of files on IPFS. The benefits of the Infura IPFS API include:
High availability: Infura ensures that the files you upload are always pinned, consistently available, and immutable.
Dynamic scaling: Should your app witness a surge in popularity, Infura addresses any scalability concerns.
Pay-as-you-go: Charges are based solely on the data you transfer and store, making it a cost-effective option.
Now, let's dive into configuring IPFS on Infura and the steps to store and retrieve files.
Step 1: Create an Infura account
The first step is to create a free Infura account. If you haven’t done so, you can create a new account here.
Once your account has been created, you will be redirected to the main dashboard. Proceed to create a new API key in the top-right of the screen.
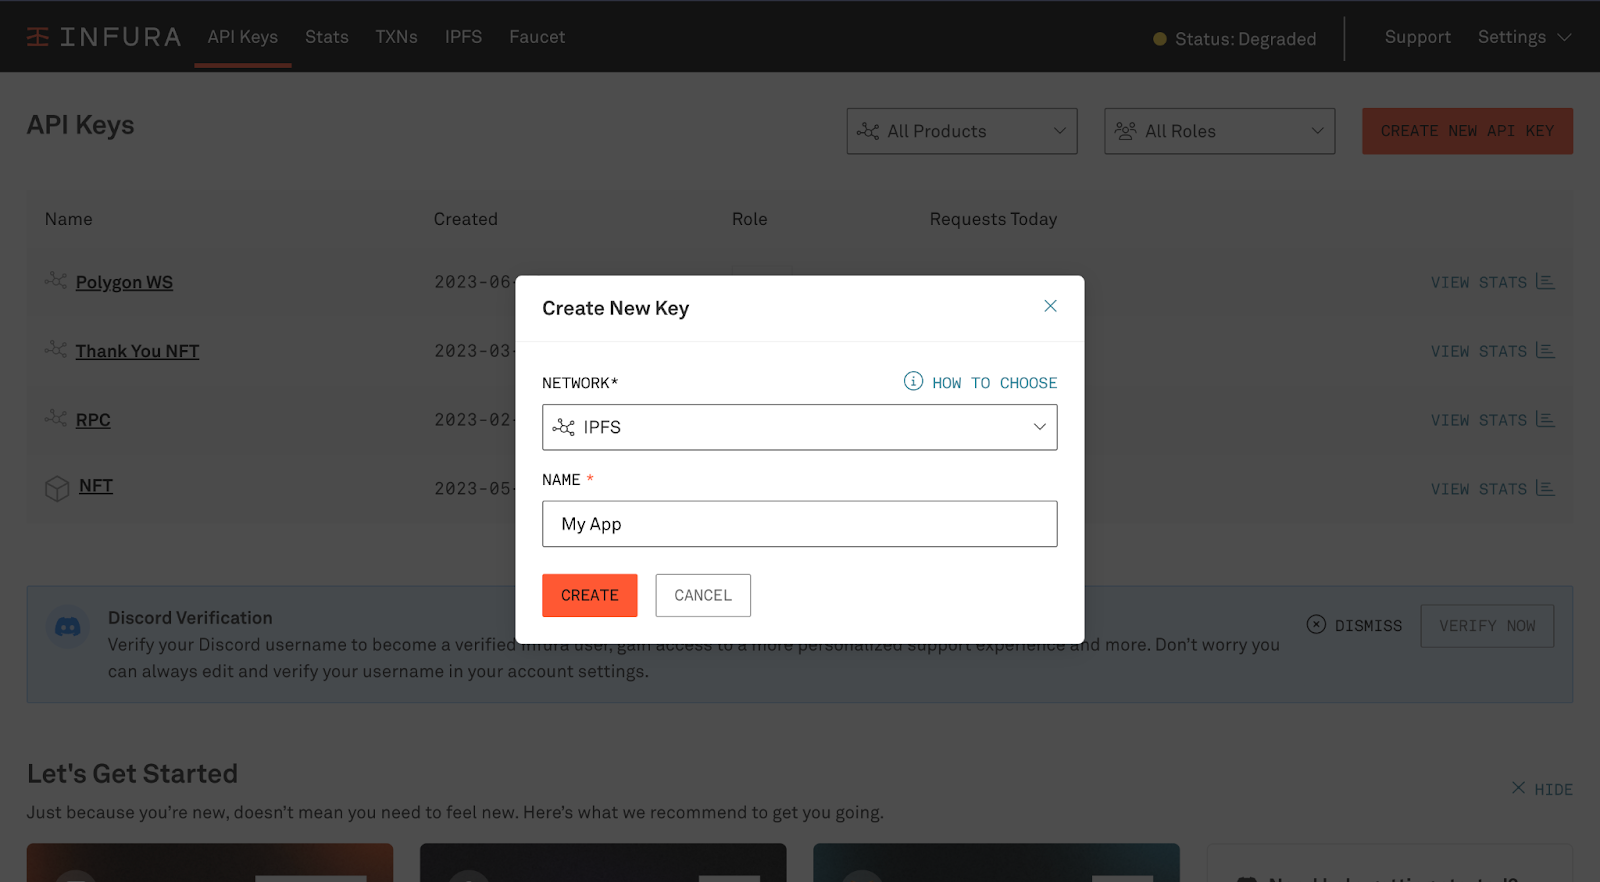
For network, choose IPFS. You can name the project whatever you wish.
Once you’ve created your key, you will be redirected to your project’s dashboard where you will be able to view the API key and API secret.
Note these as we will require both values at a later step.
Step 2: Uploading files through the Infura dashboard
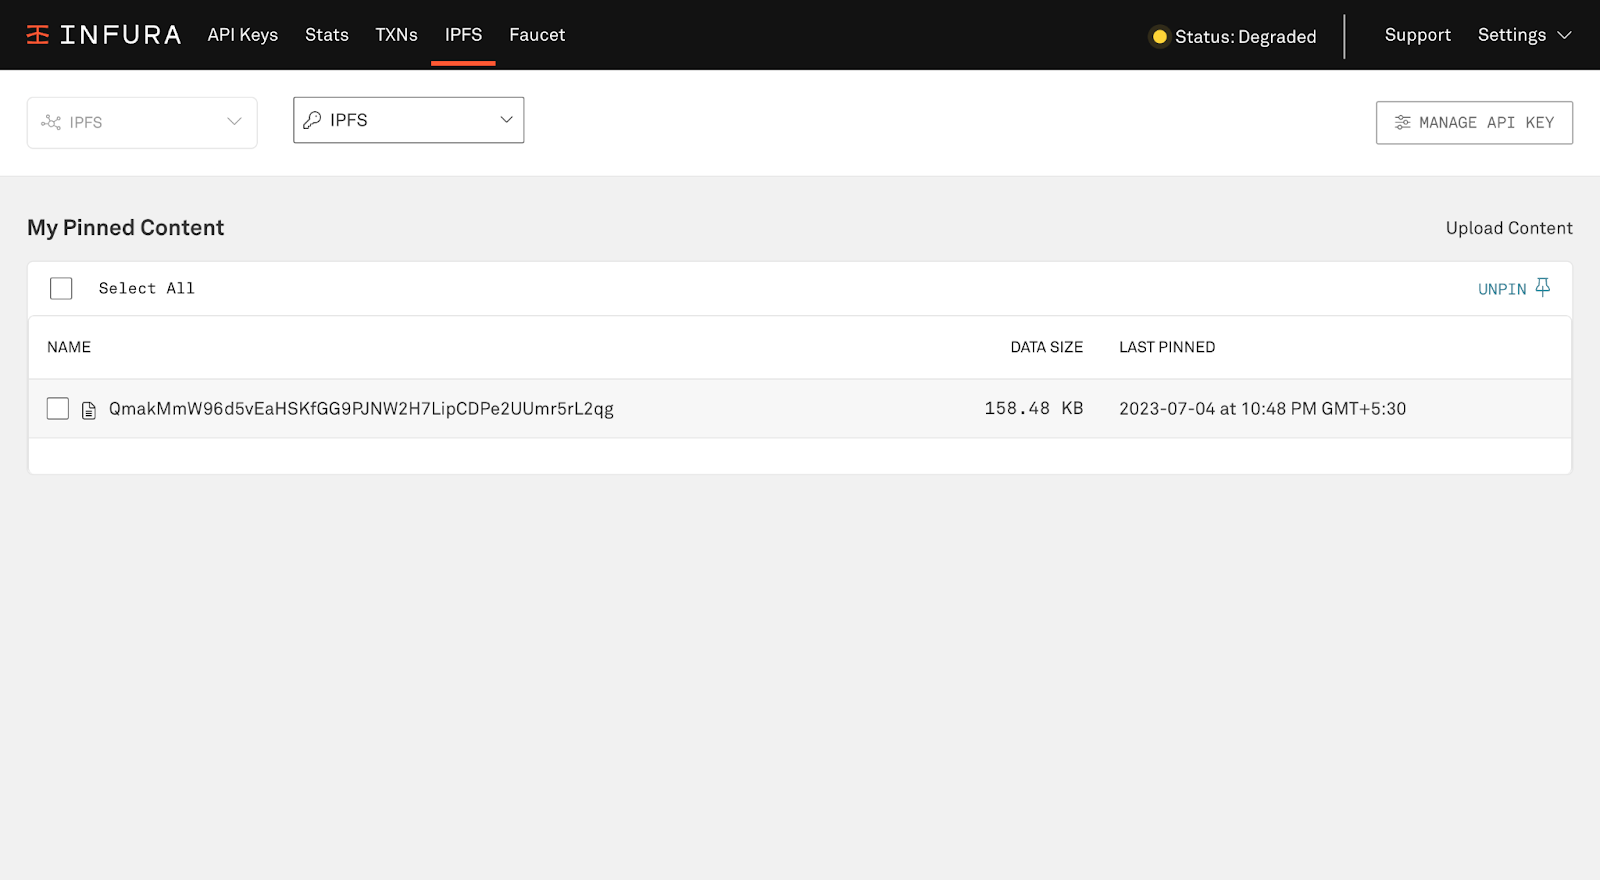
Once you’ve created your Infura account and API Key, click on IPFS on the top navbar.
You should be redirected to a dashboard that looks something like this:

Now let’s upload a file from this UI. For this tutorial, we are going to upload a picture of a cute dog.

Click on Upload Content in the top-right and choose Upload a File. Upload whatever image you want.

Once the upload is complete, you will get a message that your file was successfully pinned. This means that the image is live and available on the decentralized IPFS network.
You will also get access to a CID code. This is the hash of the file that will be used by Infura to identify this file. This hash is unique to the file. Even if you alter a single pixel of your image, the CID code will change completely (try it!).
Our dog image has the following CID: QmakMmW96d5vEaHSKfGG9PJNW2H7LipCDPe2UUmr5rL2qg.
You can now view this image online by either accessing the IPFS URL through a browser that supports it (for example, Brave) or by using the corresponding HTTP URL.
IPFS: ipfs://QmakMmW96d5vEaHSKfGG9PJNW2H7LipCDPe2UUmr5rL2qg
HTTP: https://bafybeifyl4dnxigsu2tkn3wh7wt5ttfnqoa26ujl3atfdl4xtqzdywne6m.ipfs.dweb.link/
Behind the scenes, Infura has ensured that our file is pinned and immediately accessible to anyone who clicks on the links above.
With our file now available through the links above, we can use it like we would any image file uploaded to a centralized storage solution on the internet … except with IPFS, which lives in the decentralized world of web3!
Step 3: Create a simple website
In this step, we’re going to create an extremely simple website with a single static HTML file.
Run the following commands in your terminal:
$ mkdir my_website && cd my_website
$ touch index.html
Open this repository in your favorite code editor and add the following code:
<html>
  <head>
    <title>My Dog</title>
  </head>
  <body>
    <h1>My Dog</h1>
    <div>
      <img
        src="https://bafybeifyl4dnxigsu2tkn3wh7wt5ttfnqoa26ujl3atfdl4xtqzdywne6m.ipfs.dweb.link/"
        width="500"
      />
    </div>
  </body>
</html>
Replace the src value above with the URL of your own image. Opening this index.html file in a browser will display a page that looks something like this:

Congratulations! You’ve successfully retrieved a file from IPFS onto your website!
Step 4: Upload the website to IPFS
Since our website itself is a static file, it is possible to upload it to IPFS too. While we can do this through the dashboard like we did in Step 2, let’s do this using a more programmatic approach using Infura’s IPFS upload client.
First, let’s install Go.
For Macs, you can install Go so easily through Brew:
$ brew install golang
For other operating systems, you can simply download Go from their main website here.
Now run the following commands from your terminal:
$ git clone https://github.com/INFURA/ipfs-upload-client.git
$ cd ipfs-upload-client
$ go build
Once the build is complete, uploading files to IPFS becomes as simple as running a single command. To upload index.html, use the following:
$ ./ipfs-upload-client --id <API KEY> --secret <API SECRET> ../index.html
If all goes well, you should see an output that looks something like this:
Added QmWciPjkfB9Q3rGmAEunQveqj3g7tQYpygFHNPzdH5N7kp QmWciPjkfB9Q3rGmAEunQveqj3g7tQYpygFHNPzdH5N7kp 1.385399916s
As with the image, you can now access your website using the CID generated above.
IPFS URL: ipfs://QmWciPjkfB9Q3rGmAEunQveqj3g7tQYpygFHNPzdH5N7kp
HTTP URL: https://bafybeid27lz7zmgocstqgrw6amxsjr2o6st2nd45agcn6crlwj3gq7j3zu.ipfs.dweb.link
Step 5: Pinning and unpinning content
As mentioned earlier, one of the greatest advantages of IPFS is that anyone, including you, can host files if you have the IPFS CID.
To pin someone else’s files that are available on IPFS, you can use the following command:
curl -X POST -u "<API_KEY>:<API_KEY_SECRET>" \
"https://ipfs.infura.io:5001/api/v0/pin/add?arg=<CID>"
In a similar way, if you wish to unpin content, you use the following:
curl -X POST -u "<API_KEY>:<API_KEY_SECRET>" \
"https://ipfs.infura.io:5001/api/v0/pin/rm?arg=<CID>”
Conclusion
The decentralized landscape is reshaping how we think about data storage and accessibility. IPFS stands out as the leading solution in this space, offering unique advantages over traditional centralized storage systems. With its emphasis on data integrity, decentralization and resilience, it's clear why IPFS is becoming the go-to choice for many web3 developers.
Infura further simplifies the journey by providing an intuitive interface for working with IPFS, making it easier for developers to integrate decentralized storage into their applications. As the digital world continues to evolve, understanding and leveraging tools like IPFS will be crucial.
Check out Infura's documentation on IPFS to explore its full capabilities and seamlessly integrate it into your projects.