Introducing Project Sharing
Starting today, you are now able to share your projects with one or more Infura users.


You asked, we listened. You can now share your project with other Infura users.
Starting today, you are now able to share your projects with one or more Infura users.
If you created a project within Infura, you are the Owner of that project.
You can add teammates to your projects and assign them one of two roles - Admin and Contributor.
Admins will have most of the same access to your project that you do as Owner, including being able to view and edit project settings and add more team members to the project and view the project statistics. At this stage, Admins will not be able to view or edit billing information for your project. Admins can not delete you from your project, or delete the project.
Contributors can view the project settings, including authentication keys - and Stats without being able to edit any of the settings. They will not be able to view or edit security information, any billing information or view team members for the project.
Any projects you create will be differentiated from the ones that are shared with you within the dashboard UI, and within the billing section of the dashboard. The person who created the project will still be responsible for the billing with the credit card on file, and retain ownership over the billing information and credit card on file.
This is the first of many updates to the project settings to allow more granular collaboration within your projects and account. For now, we are unable to add someone at the account level so only the project Owner will have access to view and edit billing information, but this will be coming soon, along with other updates to this feature.
We know many of you have been asking for this and we want to do it, so we’re doing it right!
Watch this space!
See below for a "how-to" and be sure to check out the Documentation for more information.
How to access the Project Sharing area
Make sure you are signed into Infura and access your dashboard

On the project you want to share or view sharing details, click on SETTINGS

Once in project settings, click on the PROJECT SHARING tab

This will take you to where you can share your project with other Infura users. Click either on SHARE PROJECT in the centre of the screen or INVITE MEMBERS in the top right hand corner.

How to share your project
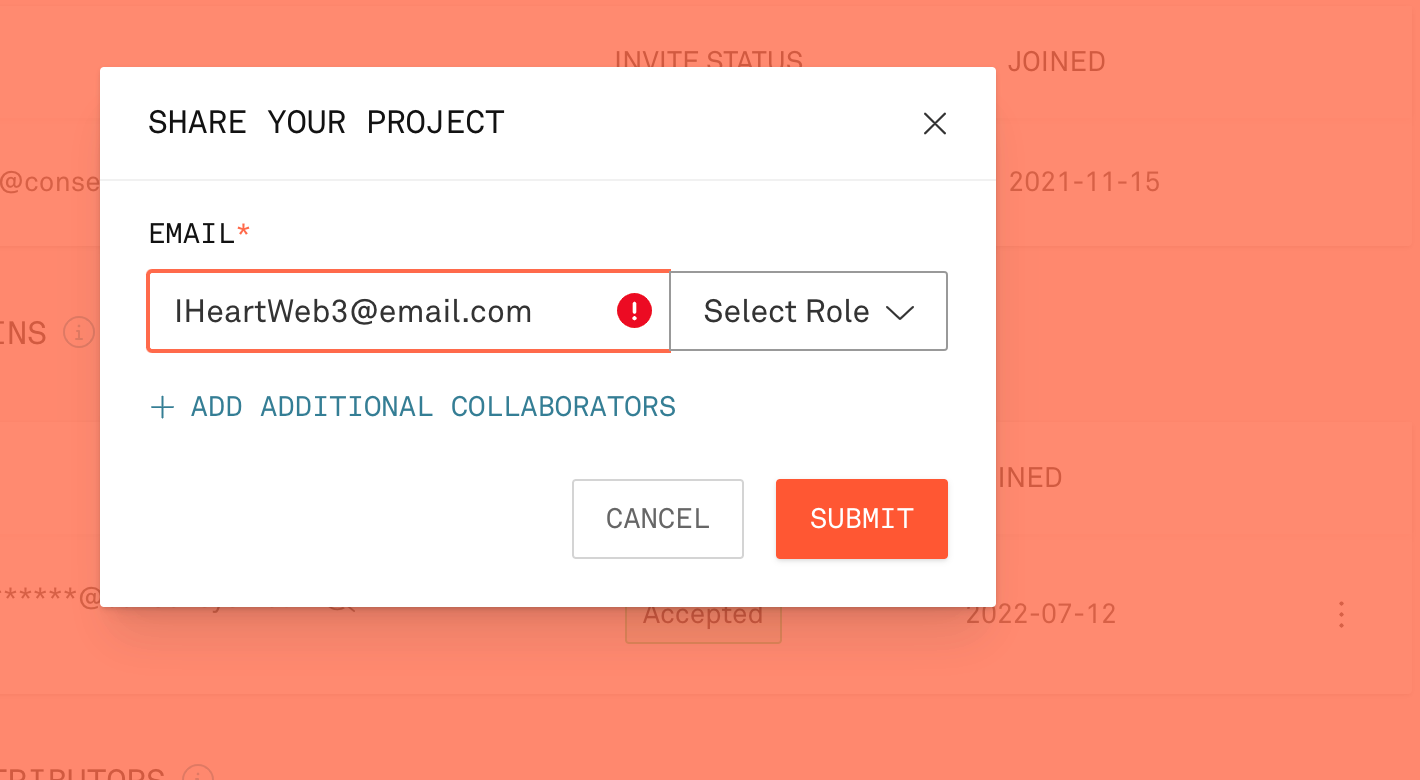
In the Project Sharing tab you can type directly in the box to start adding people to your project, if they are existing Infura users. You can select for them to either be an Admin or a Contributor.

To add more than one person at a time, click ADD ADDITIONAL COLLABORATORS where you can invite more people and choose a role for them.
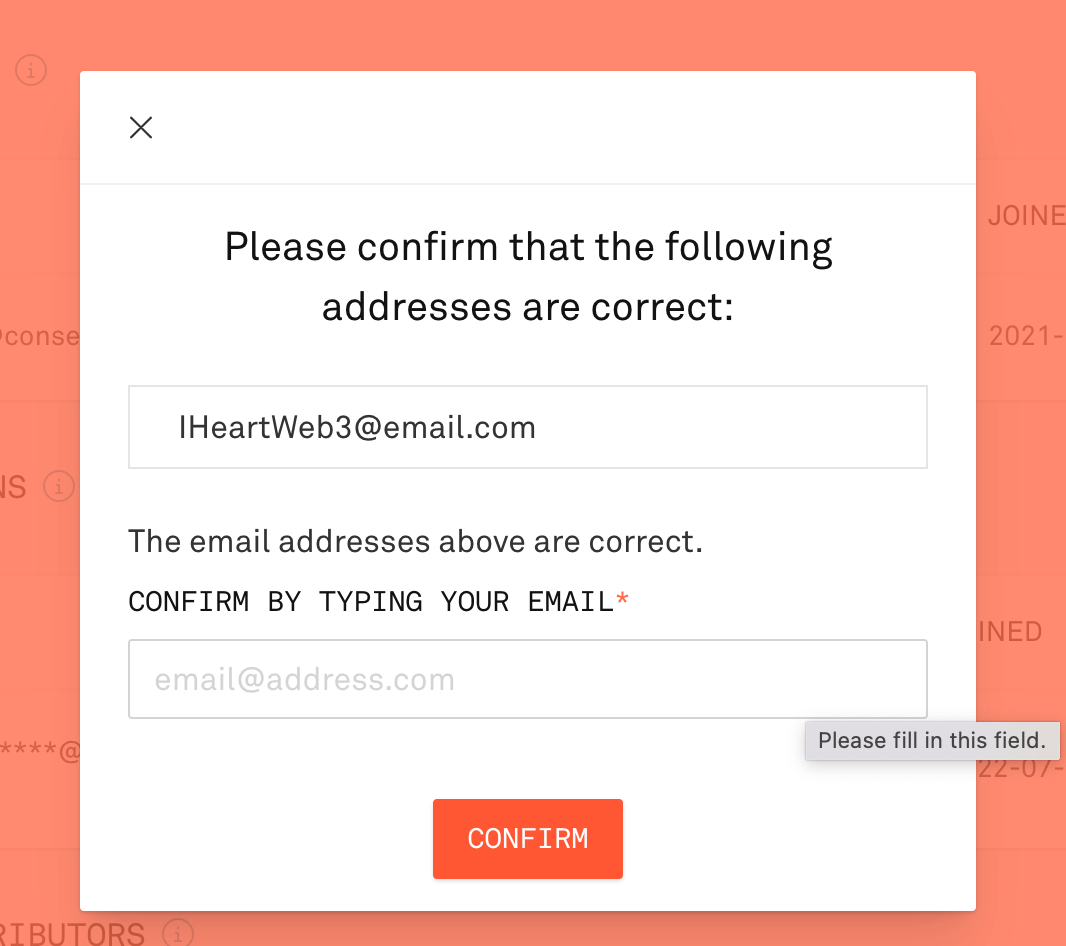
Once you have selected the role, click on SHARE PROJECT. You will then be taken to a confirmation page where you can check the emails were entered correctly. To confirm you will need to type in your email address for the account.
Once that is completed, you will see a screen with the pending invites

What the roles mean
The Owner of the projects is the person who set up the account and created the project. At this time, you cannot change ownership of a project.
Project Admin has read/write access to the project name, security settings, collaborator list. They can edit security settings, change someone’s role, revoke and resent invites. The Admin can see the project-level statistics. They cannot delete the project, or the project owner (you). Admins can not see billing, or the “All Projects” level Stats page, which displays the Stats for all projects related to the billing account. Admins can see their own billing details for all the projects they are the owner for outside of the project you shared with them.
Project Contributor has read only access to the project details, meaning they can view (and therefore use) the project API keys and the project stats, but they cannot view or edit the security settings or the project sharing settings. Contributors can not see billing, or the “All Projects” level Stats page. Contributors can, however, see their own projects and their own billing details in addition to projects shared with them.

What to do if they aren’t an Infura user
For this first release, we are only able to invite existing Infura users due to privacy restrictions around collecting personally identifiable information.
During the invite flow, if someone isn’t an existing user, or they signed up with a different address to that one you are trying to add, you will see a red exclamation mark by their email address as you type it in.

If you see this you can either contact them to get the right address, click DELETE FIELD above their email, or proceed anyway.
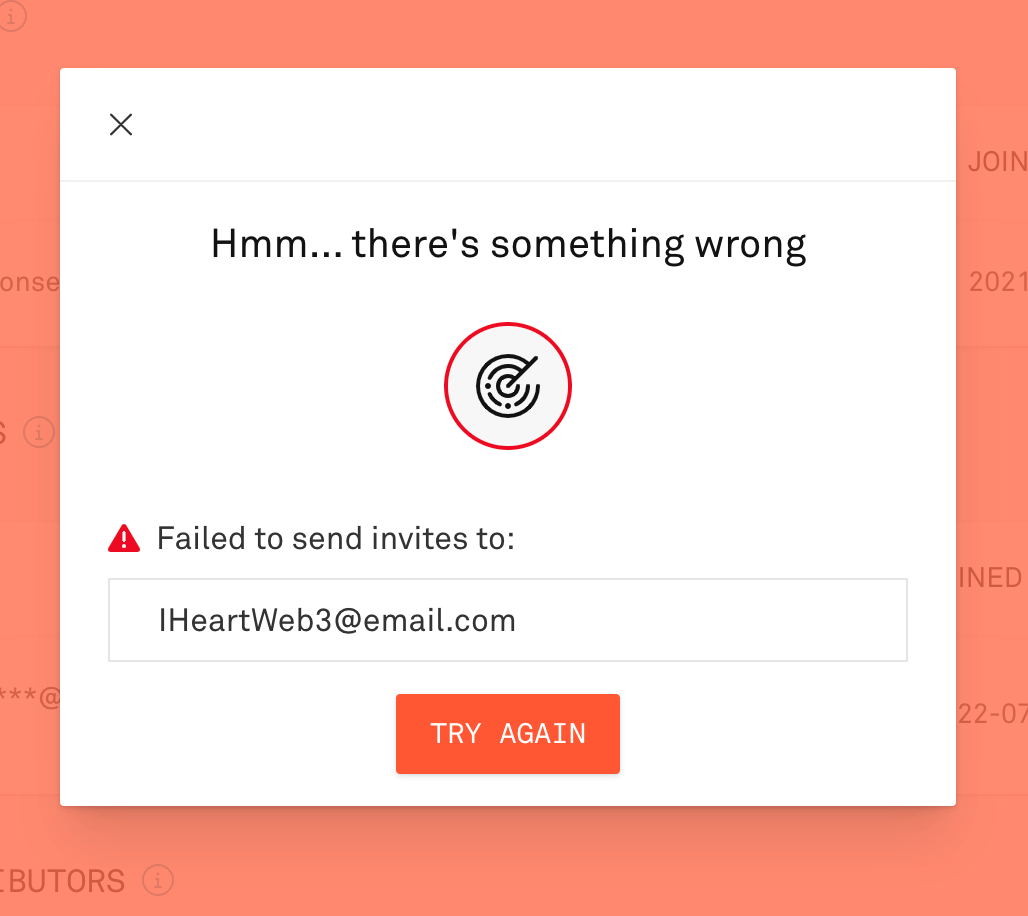
If you do proceed you will see that emails that are existing Infura users will send, whereas the ones our database doesn’t recognise will not.
How to accept a shared project
If someone invites you to their project you will see an email

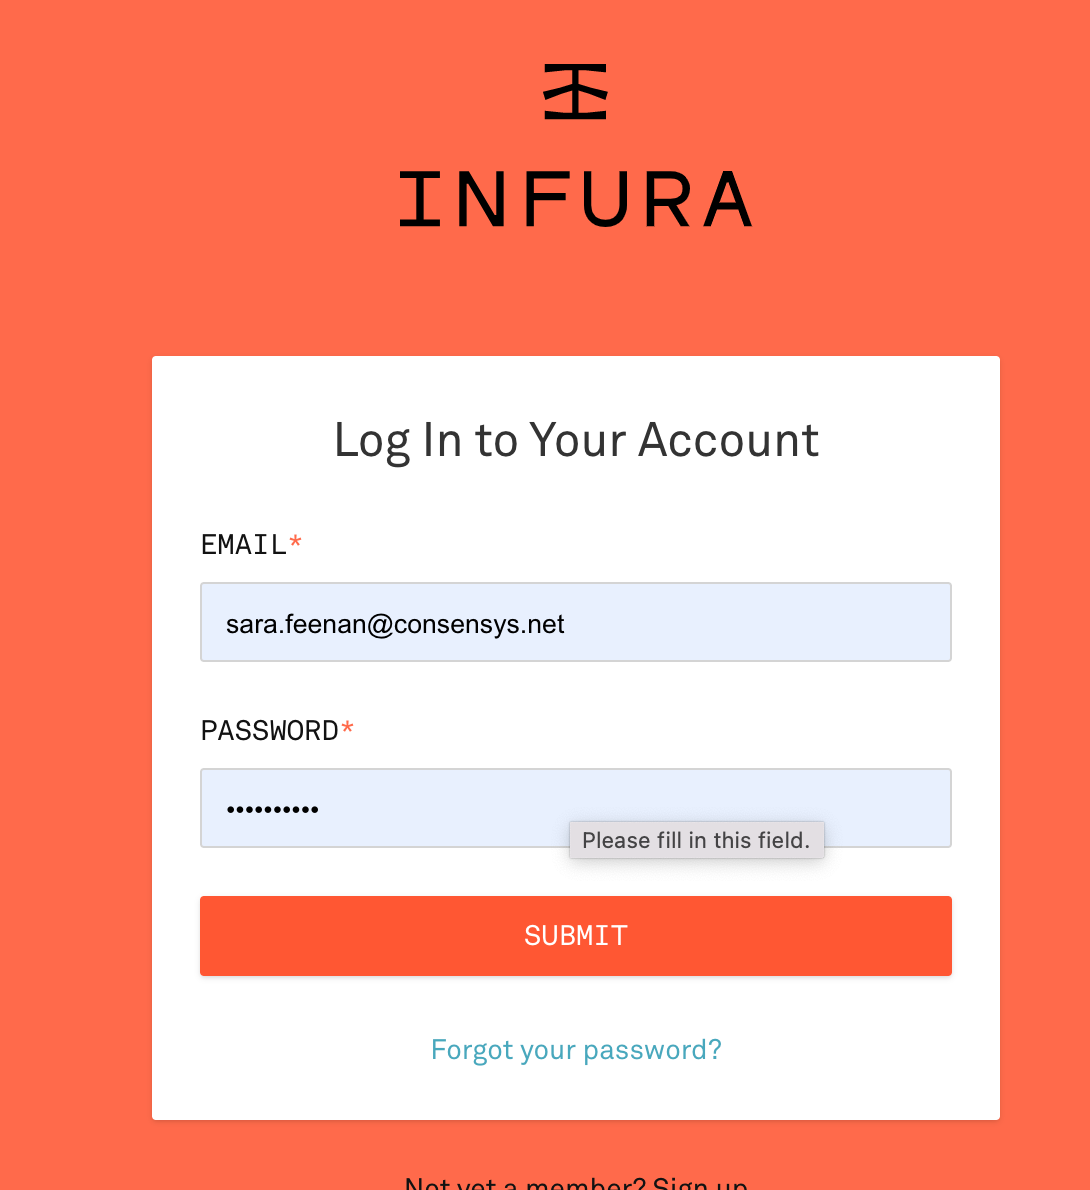
Click CONFIRM EMAIL ADDRESS. You will then be taken to the login screen
You will be taken to your Dashboard where you will see the Project added to the list of available Projects

From here you can see what role you have on that Project and go straight to the Settings page
How to change someone’s role
If you would like to change someone’s role on the Project to either give them more or less access, you can do that within the Project Sharing tab of the Settings of your Project. They will need to have accepted the invite first.
Click on the menu to the right of that user with the three vertical dots

Select Update Role and from here you can either change an Admin to a Contributor or a Contributor to an Admin. Click Update Role to confirm, or Cancel.

How to remove someone from your project
If you would like to remove someone from your Project after they have accepted the invite, follow the instructions in the Project Sharing tab of the Project Settings page in your Project
How to revoke or resend an invite before they have accepted
Revoking or resending an invite can be done from the Project Sharing tab on the Project Settings page before they have accepted the invite.
Follow the instructions in the menu with three vertical dots on the right hand side of the collaborator’s name and role.


