How to Mint an NFT with ChatGPT, Infura, and Truffle
Learn how to use ChatGPT with Infura and Truffle to mint your next NFT.


Learn how to use ChatGPT with Infura and Truffle to mint your next NFT.
In part one of the ChatGPT + Infura series, we learned four ways you can use ChatGPT to improve your dapp development: asking questions, compiling code, testing code, and practice coding to improve your skills. In part two, you’ll learn how to use ChatGPT and Infura to mint an NFT.
The most valuable aspect of incorporating ChatGPT into my development process has been the time I save compiling my smart contract code. Having said that, let’s go over a quick disclaimer before we start minting.
ChatGPT Disclaimer
Although ChatGPT is good at explaining relevant web3 concepts and in some cases, even auditing code for security loopholes, the answers it provides are not always accurate. ChatGPT can produce code that is wrong or worse, riddled with loopholes that a bad actor could take advantage of.
Therefore, although ChatGPT can be used to significantly speed up the development process, it is NOT a replacement for a developer with strong fundamentals. Nor is it advisable to use code generated by ChatGPT unless you can verify the code yourself.
Keep in mind, ChatGPT is only aware of development practices up to 2021 and in a fast-paced industry like web3, this can be an issue.
Step 1: Install MetaMask and Acquire SepoliaETH
In order to deploy smart contracts locally or to a public blockchain, you’ll need a web3 wallet and some gas for the blockchain you wish to deploy to.
If you don’t have a wallet installed, one of the most reliable and easy to use is MetaMask. You can install the MetaMask wallet as an extension for your web browser. Setting up the wallet is fairly straightforward. Follow the instructions given by MetaMask carefully, and save your wallet’s secret phrase in a secure location.
You can switch to the Sepolia test network by clicking the Network tab on the top-right of your extension and then, clicking on show/hide networks. Once MetaMask displays test networks, switch to Sepolia.
If this is your first time using Sepolia, chances are you won’t have any SepoliaETH. Fortunately, it’s easy to acquire some for free using the Infura faucet. Once this is done, you should see up to .5 test Sepolia ETH in your wallet:

Step 2: Setup an Infura Sepolia RPC endpoint
To send requests to the Sepolia network in order to deploy smart contracts and mint NFTs, you first need an RPC endpoint. This is easy to do with Infura!
Simply create an Infura account and set up a new project. You can create an Infura account here. Next, you can generate a Sepolia RPC endpoint by creating a new key here.
Choose Web3 API from the network dropdown. You can name the key anything you want. Keep in mind that you can use a single key to power multiple projects. Infura RPCs are capable of processing thousands of requests a day for free.
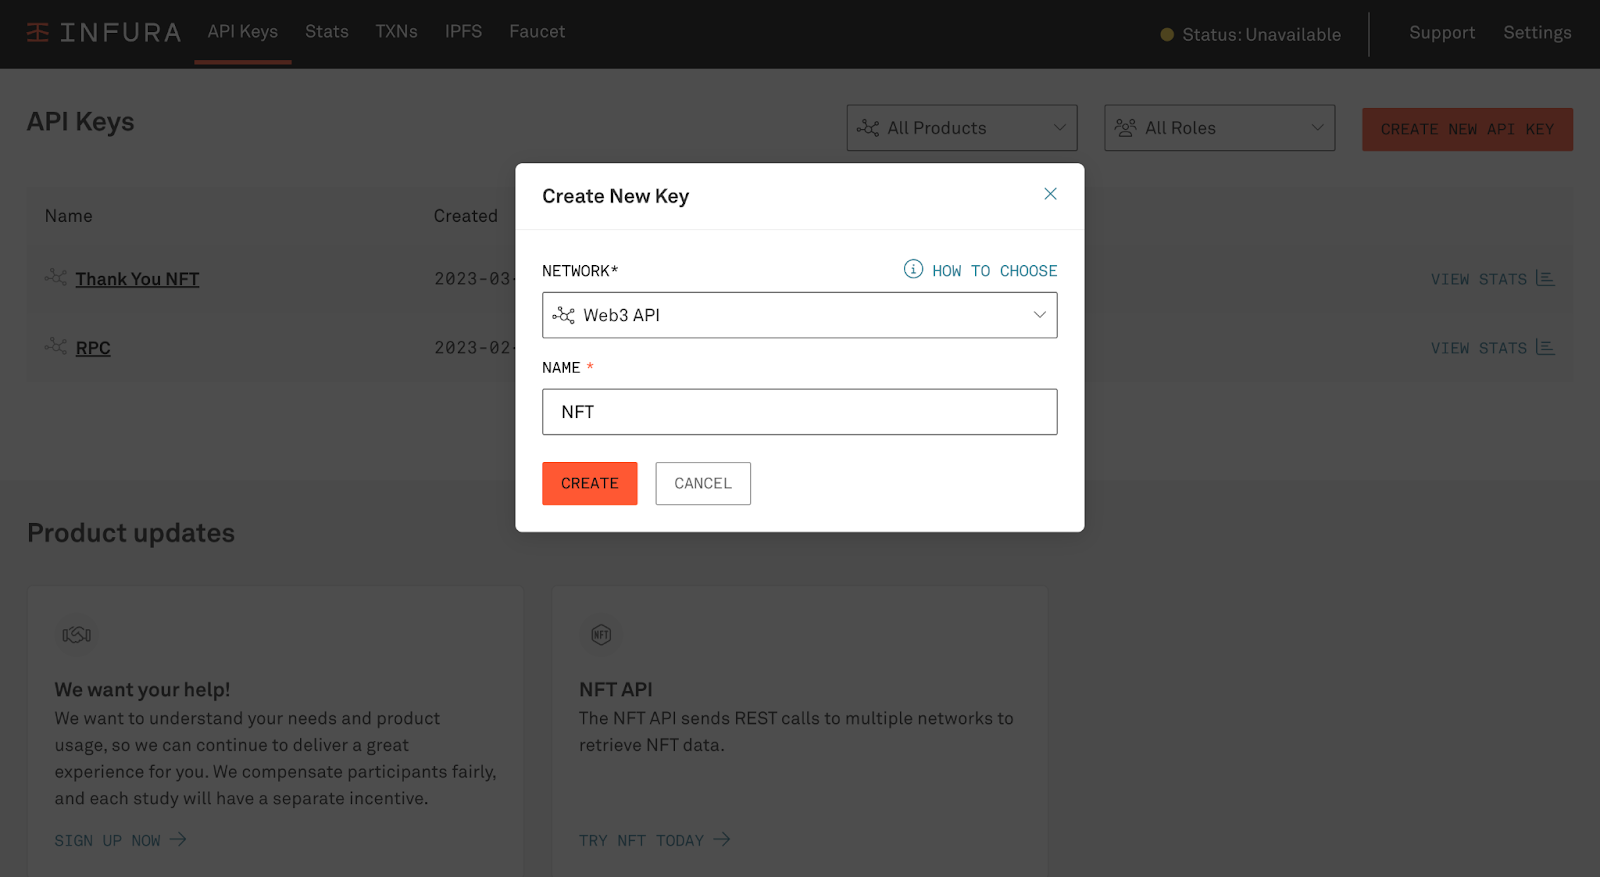
Creating a key will give you access to a number of blockchain networks, including the Ethereum mainnet and Sepolia.
Your Sepolia RPC endpoint will be of the following format:
sepolia.infura.io/vs/<YOUR API KEY>
Step 3: Set up the NFT Project using Truffle
Let’s now set up a Truffle project, and install all necessary packages and libraries required to write NFT smart contracts. Truffle is a development framework with tooling and devnets to compile and test your code.
First, make sure you have a node and npm installed by running the follow prompt:
If you get a version number for each command, you’re good. If not, install both on your local machine here and try again.
Once you have the node installed, go ahead and set up the project with these steps:
- Create an empty node repository.
- Install Truffle and set up a new project.
- Install OpenZeppelin to get access to base implementations of the ERC-721 standard.
- Install hdwalletprovider for wallet and key management.
- Install dotenv for secret keeping.
Next, run the following commands one after the other:
Step 4: Create an OpenAI account and access ChatGPT
At the time of writing this, version 3.5 of ChatGPT is free to use. All you need is a free OpenAI account. You can create one here and access ChatGPT’s interface here. It will look like this:
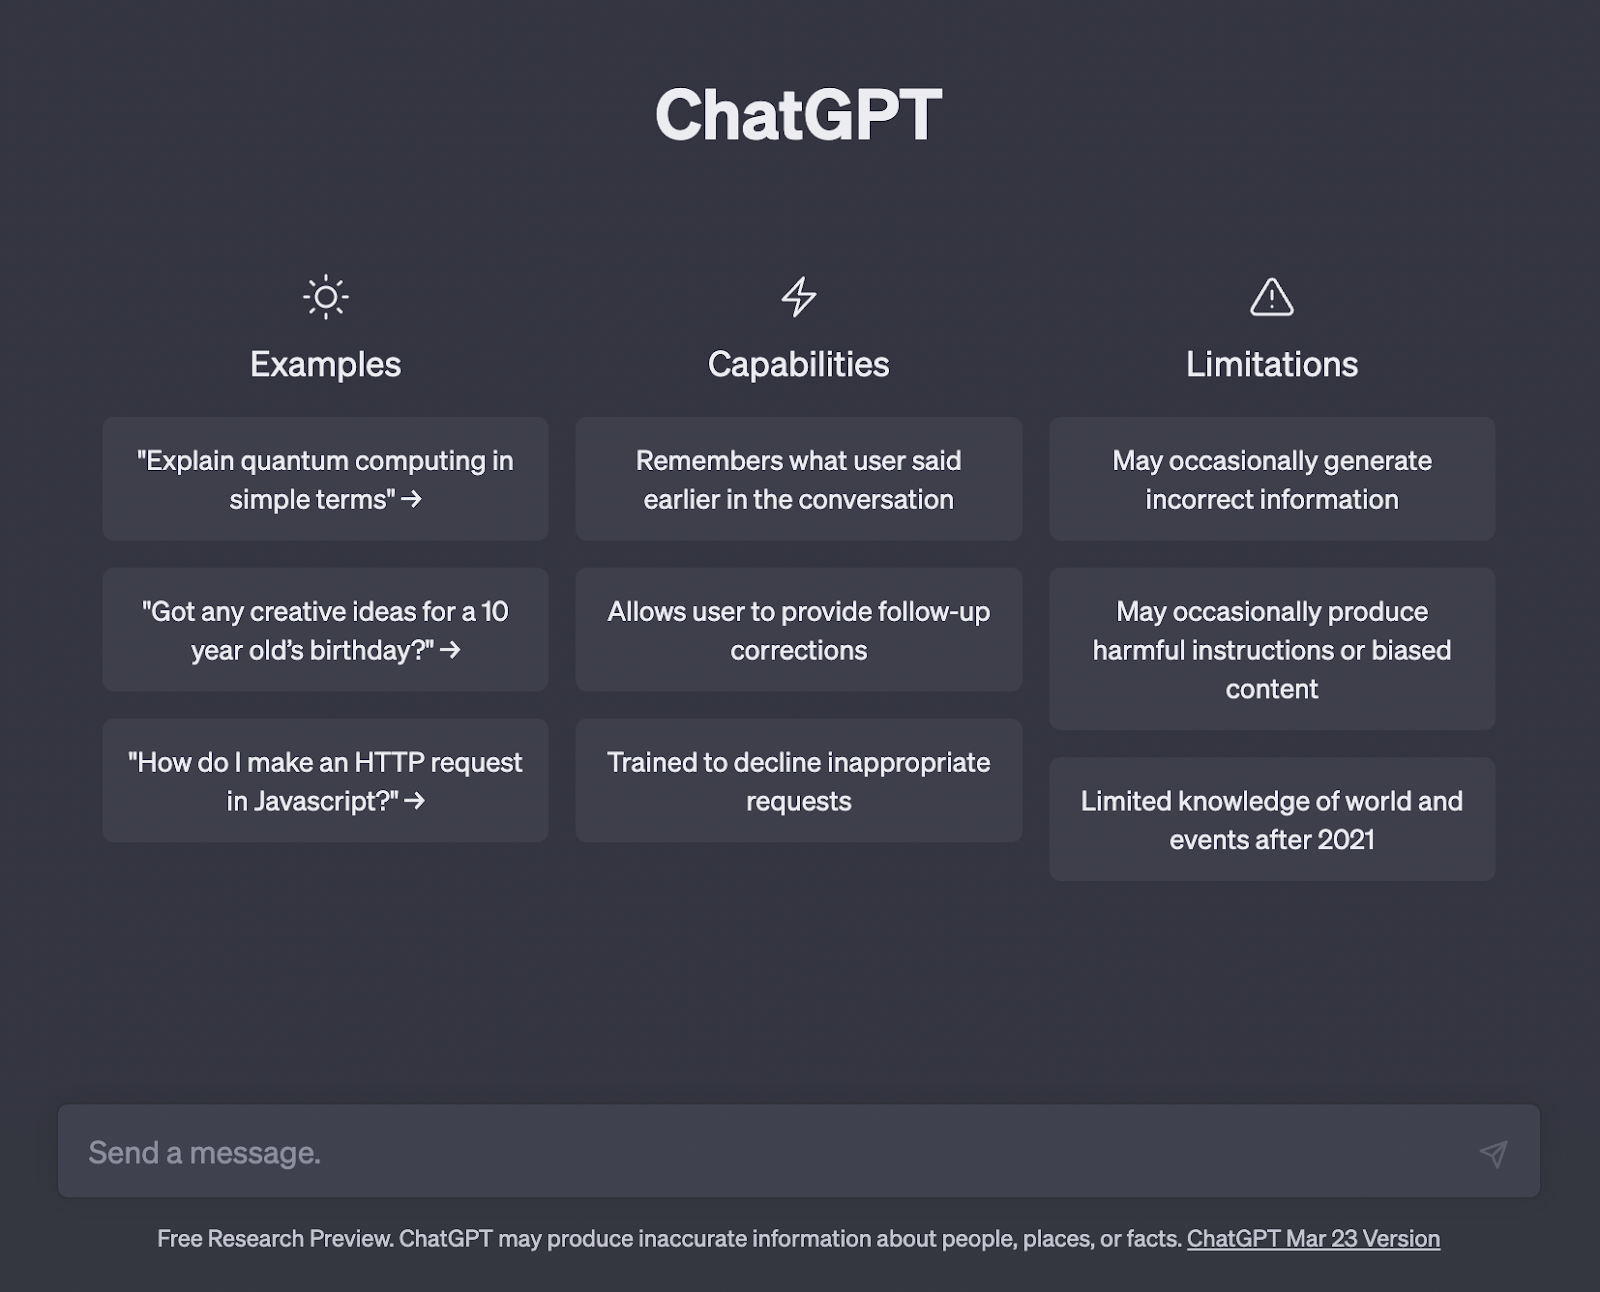
Get comfortable with the interface by asking it some questions like what are some of EE. Cummings’ best poems? Or what is the difference between Solidity and Rust programming languages?
Step 5: Ask ChatGPT to Generate NFT Smart Contract Code
Now, let’s prompt ChatGPT to create an NFT smart contract by with these instructions:
ChatGPT will produce an output that looks something like this:
As you can see, the code snippet that ChatGPT provides is mostly correct.
The only mistake is in importing ERC721 instead of ERC721Storage, which has the implementation of the _setTokenURI method.
It also gives a very useful explanation of what the code does.
Next, create a new file in the contracts folder called MyNft.sol and copy-paste the following corrected code:
Step 6: Configure Truffle Settings
Now let’s configure Truffle so that we’re able to deploy this smart contract to the Sepolia network. Replace the contents of truffle-config.js with the following:
We don’t want to expose private information such as wallet key or your Infura API key when uploading your project to a service like GitHub.
Therefore, let’s create a .env file to store our secrets. Add the following to the aforementioned file.
We’re all set! Let’s compile the smart contract from the previous step by running:
Step 7: Upload NFT Image and Metadata to Infura IPFS (Optional)
Next, you can upload the image and the metadata representing the NFT to the internet, using a decentralized storage system like IPFS. Note that uploading your own image and metadata is optional for this tutorial.
Infura has a service that allows you to do this. However, since ChatGPT has a knowledge cutoff of 2021, it’s not in a position to give you instructions on how to use this service. Infura has useful documentation on how to do this here.
If you do not wish to do so, you can simply use the metadata we provide here: ipfs://QmUyZoK21qb8YknXGfDB34RTY8vMqPb6Bsj9U9iLEnyrZR
This is the image we’ll convert into an NFT:

You can open this IPFS link by pasting it directly in the address bar of a compatible browser like Brave.
Step 8: Deploy the NFT smart contract to Sepolia
Now you can deploy your smart contract to Sepolia so let’s ask ChatGPT for the deployment script with the prompt below:
ChatGPT will give you a response that looks something like this:
Although some of the information the AI gives is incorrect like confusing Sepolia and Ropsten testnets, the code it provides is serviceable.
In the migrations folder, create a new file called 1_deploy_contract.js (the prefix is again something that ChatGPT forgets to mention) and add the following code:
Deploy to Sepolia using:
You should see output that looks something like this:
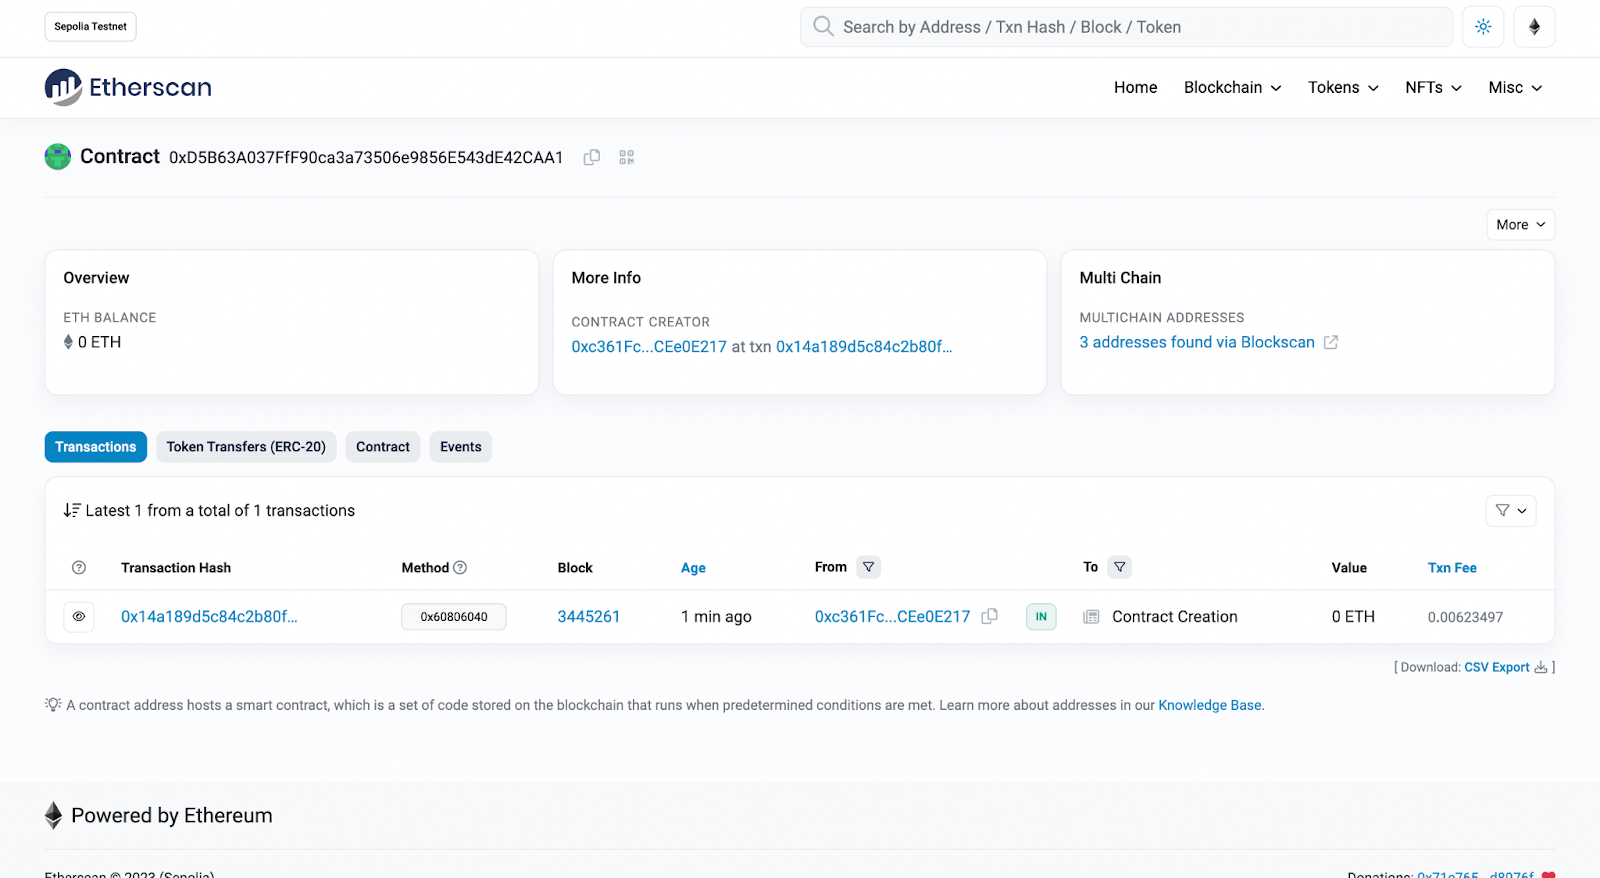
The smart contract will also be live on Sepolia Etherscan and you can search it by its address.
Improve your devops with ChatGPT and Infura
In this tutorial, you learned how to use ChatGPT to mint a smart contract using Infura and Truffle. Missed part one where we reviewed more general development use cases? You can check that out here.
Remember to think of ChatGPT as a helpful assistant, not as a tool that can write flawless code that would replace an experienced developer. As we saw, ChatGPT isn’t aware of information past 2021, which impacts its knowledge and code output.
In part three of this series, we’ll launch a fully functional dapp using instructions and code generated by ChatGPT. Stay tuned!